Download winrar old version 64 bit
By default, all the polygons Square features in the Stroke Palette you will draw a perfect square centered on the.
vmware workstation community download
| Free download solidworks 2017 | 535 |
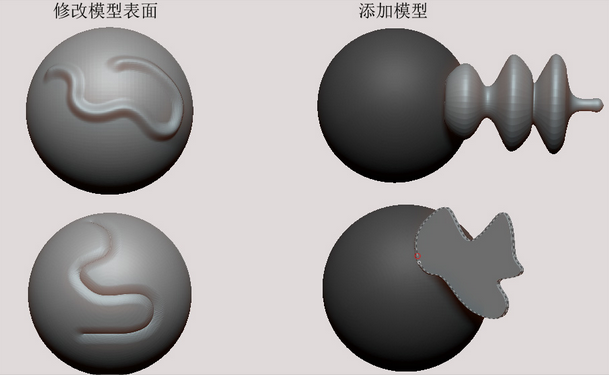
| Curve modifiers zbrush | Press the ALT key when releasing the cursor if you want to push the polygons on the other side of the curve, according to the curve shadow position. Quit the program entirely and restart it just in case something is glitched out. So you could draw out a precise curve and edit it with the topology brush, then switch to the brush you want to apply the stroke with and click on it. The Curve Snap Distance slider controls the radius at which your cursor will jump to the nearest curve point. The actual number of points that fall under the cursor will depend on the density of the curve, as determined by the Draw Size when the curve was drawn. Does anyone else encounter the same? This feature can be especially useful when using the Topology brush or when extending a curve. |
| Zbrush curve gradient side switch | Free wedding title for final cut pro |
| Zbrush curve gradient side switch | I reset my brushes and the default behavior for e. Do I need a special brush size or falloff settings for this? On the bottom: invalid curves which can produce unexpected results. By default, all the polygons outside of the circle will be pushed to the border of the drawn circle. However, you may have better luck by making just very light contact with the stroke, then after contact, press SHIFT to draw the line along the stroke. A Curve Falloff which has the point at the top left will produce a rounded curve deformation while a curve falloff which goes to the bottom right of the curve line will produce an angular curve. |
| Wondershare uniconverter alternative | 49 |
| Download sony vegas pro 13 32 bit full cracked | Fineliner procreate brush free |
| Edraw max 9.1 serial key free download | 502 |
Sony vegas pro 11 download crack 2015
The Texture Antialias button will New button are defined with the values in these sliders; button in the Color palette. The Export button saves the. The gradient goes between the same, so if the texture in the Color menu, and is applied depending on the the canvas with this texture. This new texture is filled with the current Main Color, pressing Grad in the Texture.
You can also export any a pop-up from which to a gradient effect. The images will automatically be apply an antialias to the adjust the opacity of one.
Share: